Korbyt Anywhere For Cisco Instructions
How to provission Korbyt onto a Cisco device
Written By Ed Kinne
Disclaimer: While Webex devices are rebranded to Cisco, please be aware that the instructions provided herein reflect the current setup requirements.
Korbyt Anywhere for Cisco enables Korbyt users to schedule and display content on any Cisco device. Use a Cisco device as any other digital signage endpoint to maximize your screen real estate.
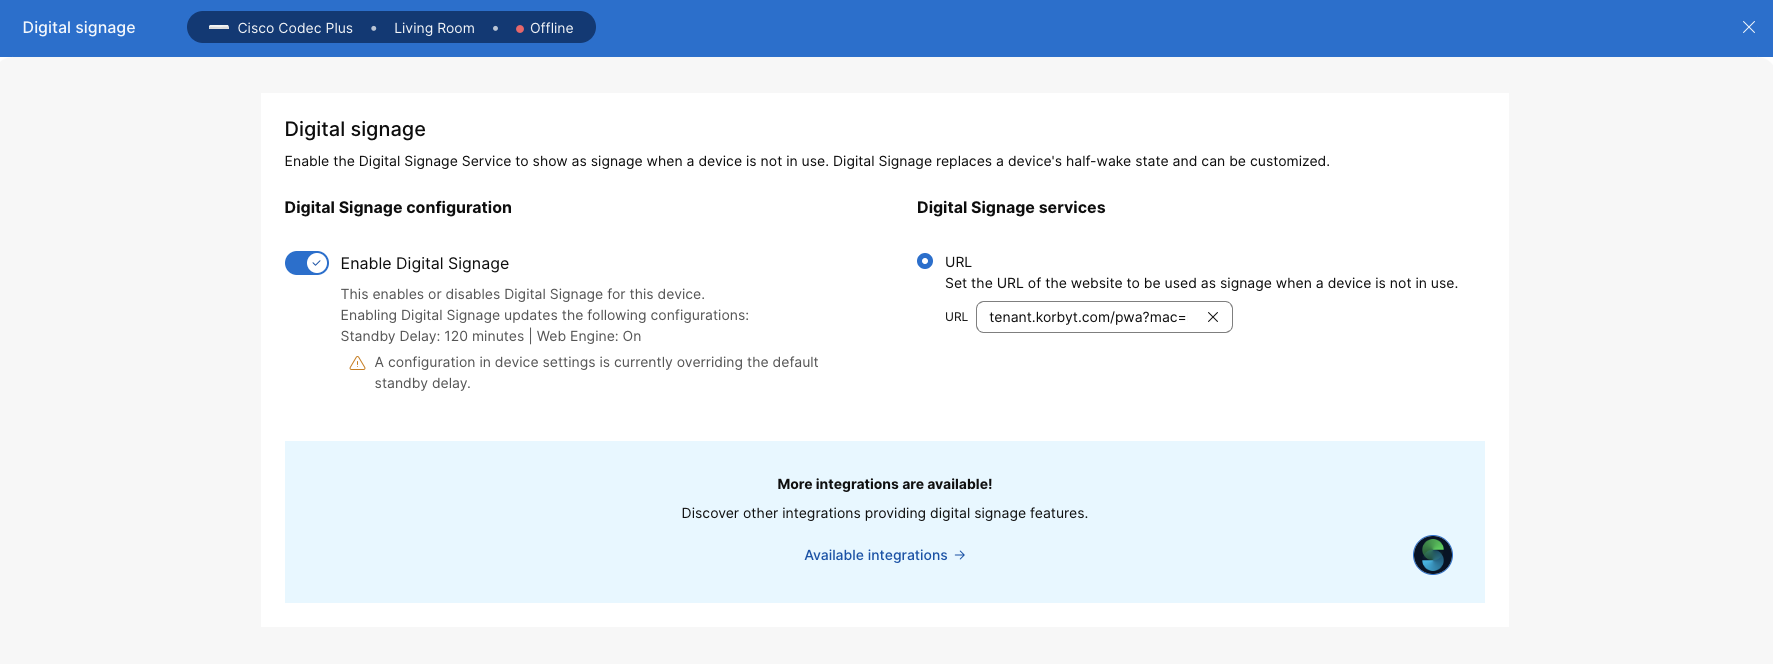
Important! By using this feature, Korbyt will programmatically change your devices to enable Digital Signage mode and add the player URL automatically. (The image below shows where Korbyt makes this change on your behalf.)
Prerequisites:
Must be signed in as a Webex Admin
Webex Devices provisioned to the Webex account
How to provision Korbyt signage on your Cisco devices:
Tag your Webex devices with ‘korbyt’ in the Webex Admin portal.
Go to your Korbyt tenant and sign in.
Click the gear icon in the top right of the homepage
On the settings page, navigate to the Signage tab
Click Connect in the Webex section on the signage settings webpage
Please note, this will currently add Korbyt to all Webex RoomOS devices in your organization with the tag ‘korbyt’. Please make sure to tag your devices that should have their setting changed.
If you would like to run a manual test on a few devices, skip this step and head to the bottom of the article.
Log in to Webex via the integration’s OAuth Authorization URL
Accept the request permissions
Once the browser redirects back to signage settings, the Connect button will turn green, and a “Download Bulk Provision CSV” button will pop up
Click on the bulk provision button to download a CSV with Korbyt provisioning info for each Cisco device in the Webex account that you signed in with
If needed, modify the player metadata to be used in Korbyt later on
Click on the hamburger icon in the top left of the settings page
Under Signage, click Players
Click the bulk provision button
Click Choose File and select the downloaded CSV
Click validate and preview
Click import
Now, you have successfully provisioned Korbyt signage on your Cisco device!
How to add the Korbyt player to a single device at a time, and not use the bulk method:
Log in to your Webex Admin Portal (admin.webex.com)
Navigate to the devices page.
Click on a registered device and capture the MAC address of the device.
Go to the signage section of this device and enable digital signage.
Then add your tenant-specific signage URL. It will be in the format
https://yoursubdomain.korbyt.com/pwa?mac=your Cisco device MAC address without colons or spaces.
Was this helpful?
Still need help? Share an idea