Player Groups and Access Permissions
Controlling Player Groups, Limiting Access, and Player Notification Options
Written By Ed Kinne
Player Group Basics
Player Groups are used to
Organize into Groups for playlist assignment, reporting, and dashboard views.
Content can be assigned to a Player Group instead of individual players
Control Access to the Player
Player Groups can be set so that only members of specific User Groups can see the players
Users can not assign or edit the playlist for a Player in a Player Group they do not have access to
Player Groups are also how Alerts and Permissions for players can be set
The CMS can send emails to selected users when a member of a Player Group has a Status Change (Active to Inactive, for example)
Creating Player Groups
To view player groups
Click on the Mega Menu in the upper left; in the Device Management column, click Player Groups

This screen shows player groups and can be viewed as a List or as Cards
Selected in the upper right
Individual Players can be member of Multiple Groups
Player Group Types
Player Groups can either be Static or Dynamic
Static Player Groups are manually managed to add or remove players as members
Membership is managed “by hand” using check boxes
Dynamic Player Groups select their members based on rules that examine Player Metadata
Players become members by having Metadata that matches the group’s criteria

Creating Player Groups
To create a new player group
Click Add Player Group.

Provide the necessary information in the Details section.
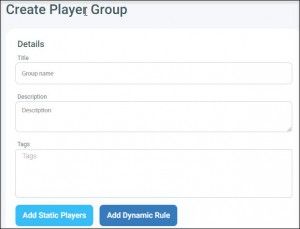
Group Name, and optional Description and Tags
Select Add Static Players or Add Dynamic Rule
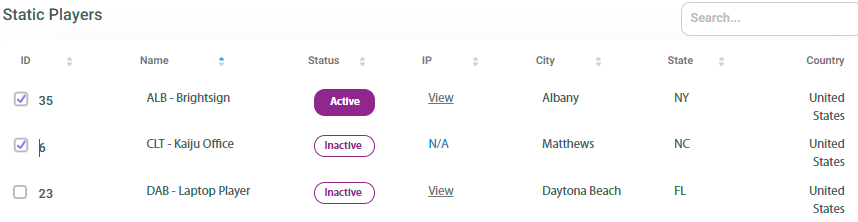
Add Static Players
Click the check boxes to select a player to be a member of the group
or
Add Dynamic Rule
Use the drop-downs to Select the Field, Operator, and Value
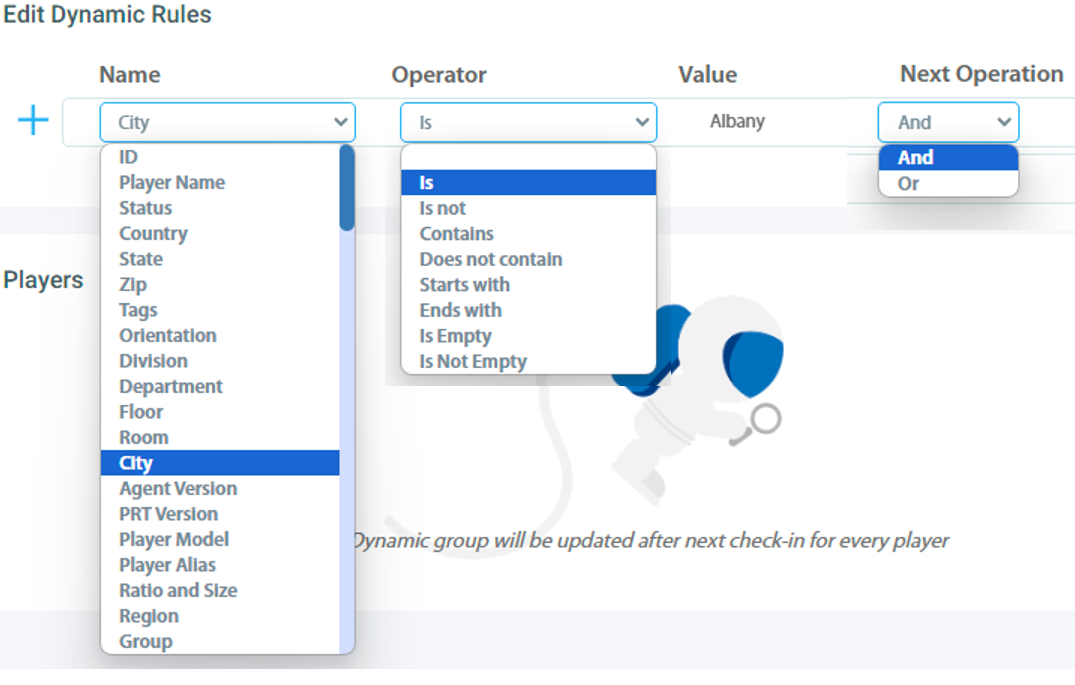
If there are multiple operations, you can select if they use the AND or OR logical connector
Click the Save button in the upper right
This will close the window
Player Group View Options
On the Player Groups Screen, you can view the Groups in either List or Card View, similar to viewing players.
Viewing Players In a Group
You can also view details of specific players in a group
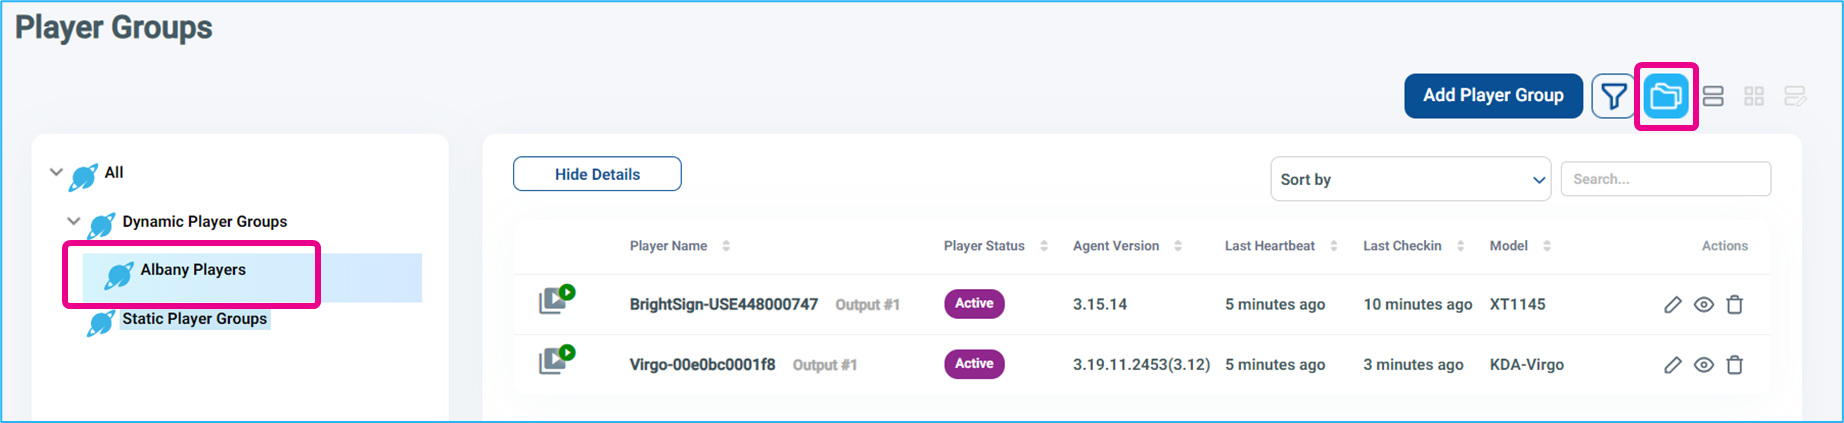
Click on the Folder icon in the upper right
This will open the Groups on the left side
Click on the group that you want to see the members of
This list of players can also be viewed as a group of card tiles
Player Group Actions and Settings
Clicking the Pencil for a player group opens the Edit Player Group window, which allows you to change group membership, but also control other settings and actions for the group.
Player Group Actions
Similar to Player Actions, Player Group Actions allow you to send a command to the players to carry out a specific behavior.
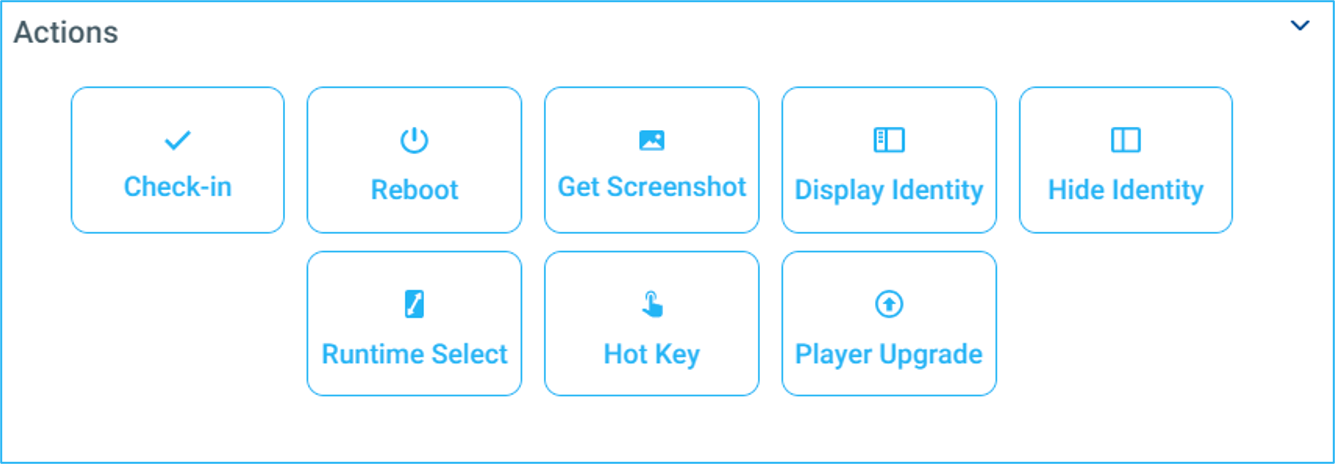
The specific Actions available will vary based on the type of players in the Player Group
Groups that are the same player operating system offer more Actions than mixed OS groups
These commands require the player to be Active to carry them out. Commands sent to Inactive Players will wait until the player becomes active again.
Check-in ~ Causes the Players to do a full check-in on their next heartbeat
Check-in ~ Causes the Players to do a full check-in on their next heartbeat
Normal Check-In happens every 15 minutes
When you click Check-In, it will schedule the check-in process to each group member to happen on the next heartbeat from the player
Reboot ~ Reboots the devices on the next heartbeat or at a scheduled time
Reboot ~ Reboots the devices on the next heartbeat or at a scheduled time
When you click the Reboot Action, it will present a Checkbox to select next heartbeat or a scheduling window to set a date and time
After making your selection, click Send Reboot to confirm, and it will be listed in the Pending Actions
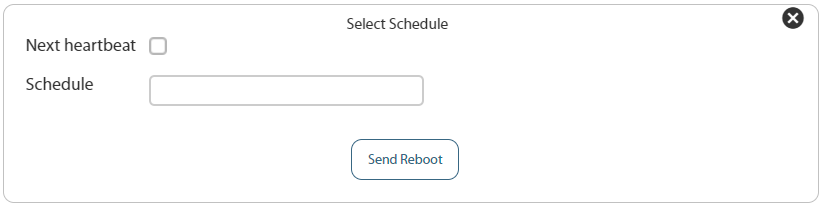
You can abandon the command without sending by clicking the black X
Get Screenshot ~ Retrieves an updated screenshot image from the player
Get Screenshot ~ Retrieves an updated screenshot image from the player
Sends the Get Screenshot command to all players in the group
After the command is carried out, refreshing the Players screen will show the new screenshots
Display/Hide Identity ~ Shows or Hides a watermark of the player's information
Display/Hide Identity ~ Shows or Hides a watermark of the player's information
Display Identity makes the player display information about itself on the screen in a watermark that will be presented on top of whatever content is being played
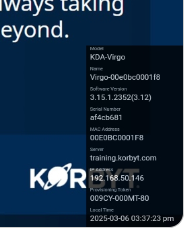
Player Model, Name, Agent Software Version, Serial Number, MAC Address, Server, IP Address, Provisioning Code, Local Time
This information can be helpful in identifying which player is controlling which screen, and other player information
Hide Identity turns this information off
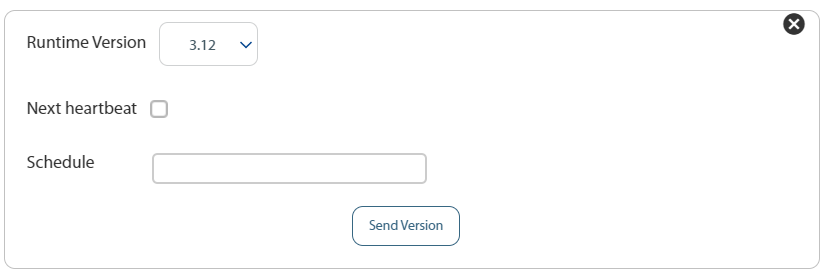
Runtime Select ~ Set a Runtime Environment Version (PRT)
Runtime Select ~ Set a Runtime Environment Version (PRT)
Only available in Player Groups that are the same type of player
Korbyt players use Chromium to display content.
PRT or Runtime is used to help Chromium execute tasks and events that are responsible for handling how content is displayed and scheduled to be displayed on players.
Newer versions of Runtime allow newer features of Korbyt to Function Properly and keep all functions running smoothly.
If your players are not using the latest verion of PRT they may encounter errors or difficulty
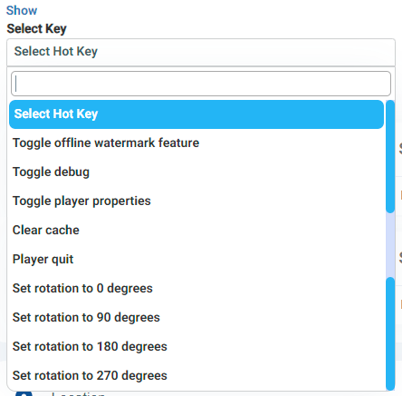
Hot Key ~ Send the players a Hot Key command
Hot Key ~ Send the players a Hot Key command
Hot Key Commands are for KDA and KWP devices
They are not compatible with BrightSign Players
Use the Drop Down to select the Hot Key command you wish to send
Player Upgrade ~ Upgrade the Korbyt Agent Software
Player Upgrade ~ Upgrade the Korbyt Agent Software
Shows available upgrades for the group
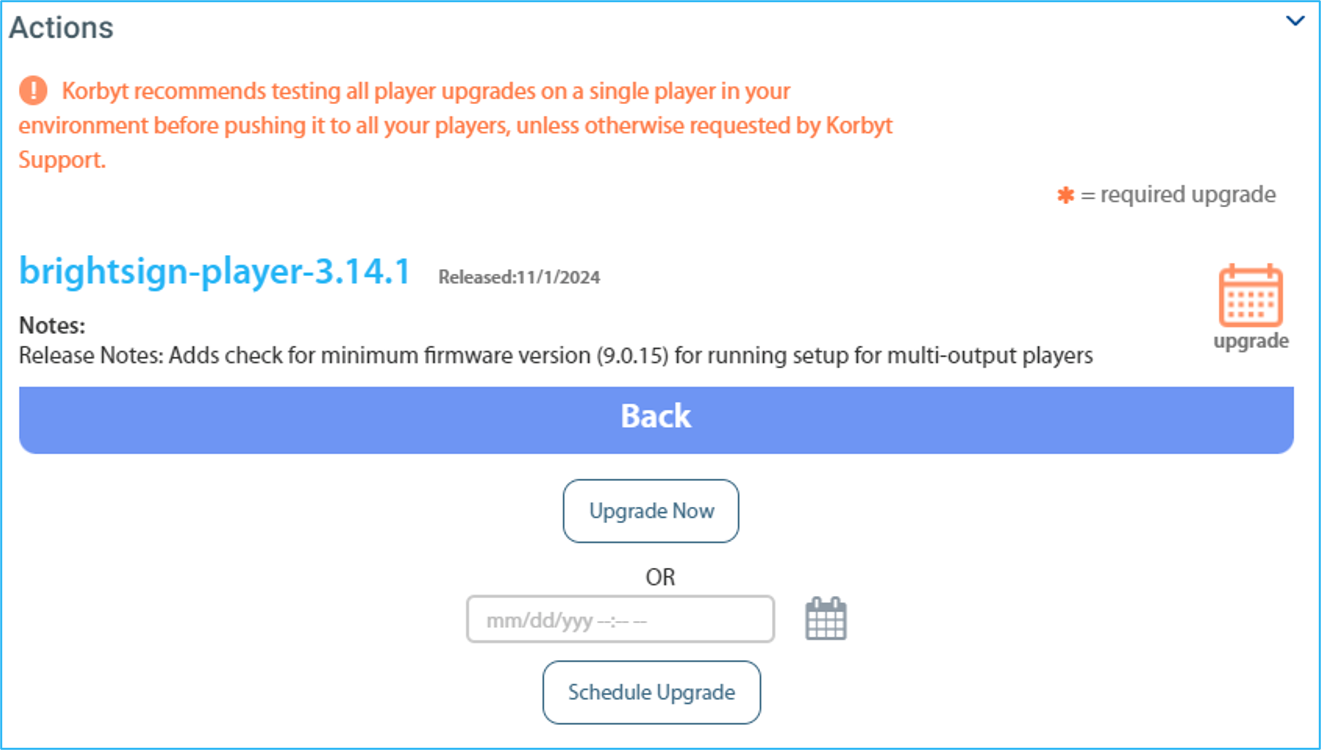
Available updates will depend on Player Type and available new versions
Korbyt recommends testing all player upgrades on a single player in your environment before pushing it to all your players, unless otherwise requested by Korbyt Support.
Stairstepping is not generally required unless indicated on specific version notes
After clicking Upgrade for a specific version, you will be asked for scheduling information
You can upgrade on the next heartbeat, or at a scheduled time
Player Group Blackout / Sleep Schedule
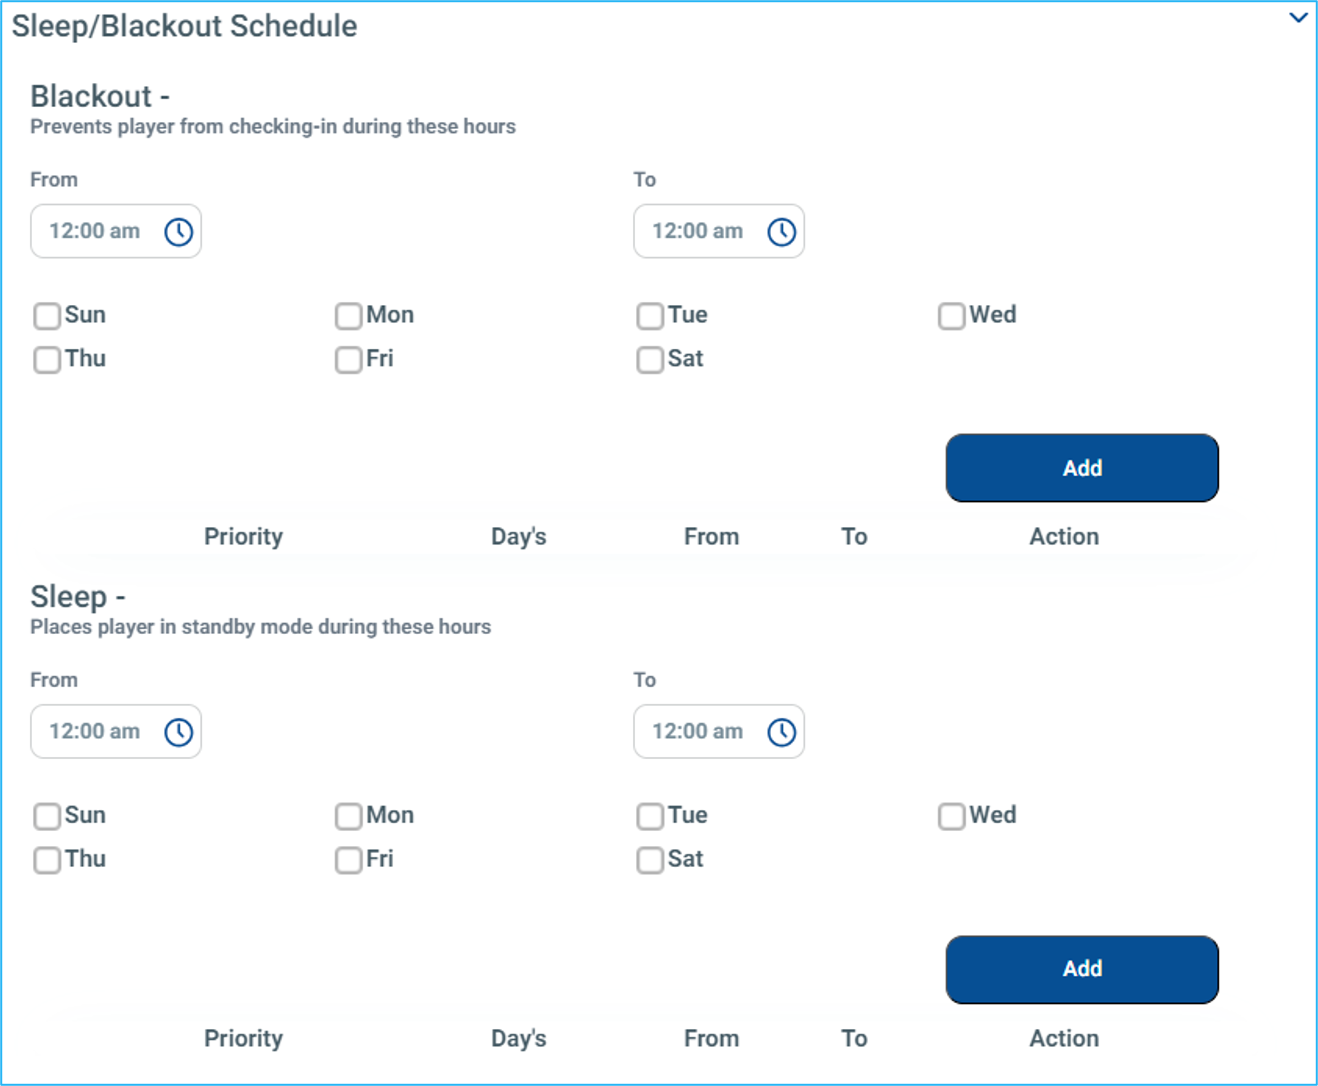
Blackout and Sleep Commands are not supported on all Players
Blackout - Sets a time when the player will not perform normal Check-In behavior. Can be helpful when network traffic is critical at a location with slow or limited availability. Will stop content updates from happening during the Blackout period
Sleep Schedule - Sets a time when the player unit will enter sleep mode. The Screen behavior and programming will decide what shows when the Media Player goes to a sleep state. Most will also enter a power save mode, but that is not guaranteed
Player Permissions
Player Group Permissions is a way to control which users can view, edit, and schedule content to specific players.
The Default Setting for a Tenant is that Player Group Permissions is turned off.
If you would like to use Player Group Permissions, the Feature has to be enabled in your Tenant’s Settings (Gear Icon)
To Enable Player Group Permissions
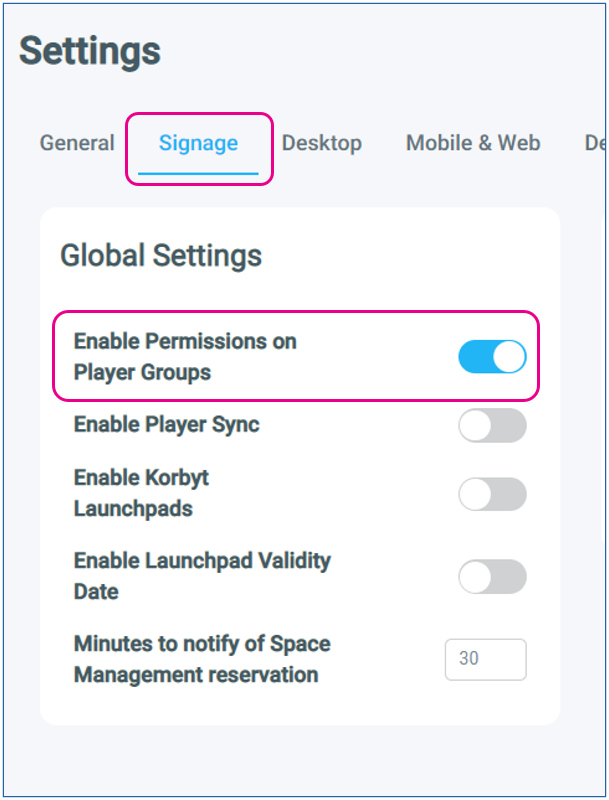
First, open the Tenant Settings by clicking on the Gear Icon either in the upper right corner for the Mega Menu, or in the bottom left for the Navbar
Select the Signage tab
Click the toggle to Enable Permissions on Player Groups
Click the Save button in the upper right
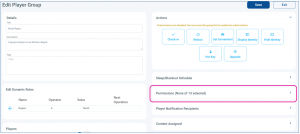
Now that Player Group Permission is turned on, it will be a section on the right in the Edit Player Group screen
To Set a Player Group Permission
Expand the Permissions section to the right of the Player Group
Disable Global Access,
You will see that Tenant Administrator is a group that checks itself
Tenant Administrators will always have access to all areas of Korbyt
Then select the other Groups that you wish to have access to the players that are members of this group
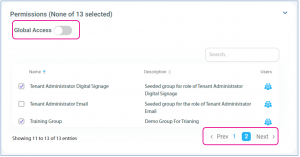
The users who are not in the groups selected will not be able to see the members of this player group or edit playlists that are assigned to the players in the group
User Groups are created by System Tenant Administrators; for more information, see How To Manage CMS Users And User Groups
Click the Save button in the upper right
Player Notifications
Korbyt supports alerting Content Management System (CMS) Users if a media player changes status, becoming Inactive or Active.
This requires creating a Player Group, as notifications are a setting available in a Player Group.
To create a Player Notification
In the Player Group, expand the Player Notification Recipient section
In this section, you can specify which users get notified about the player events and through what communication channels
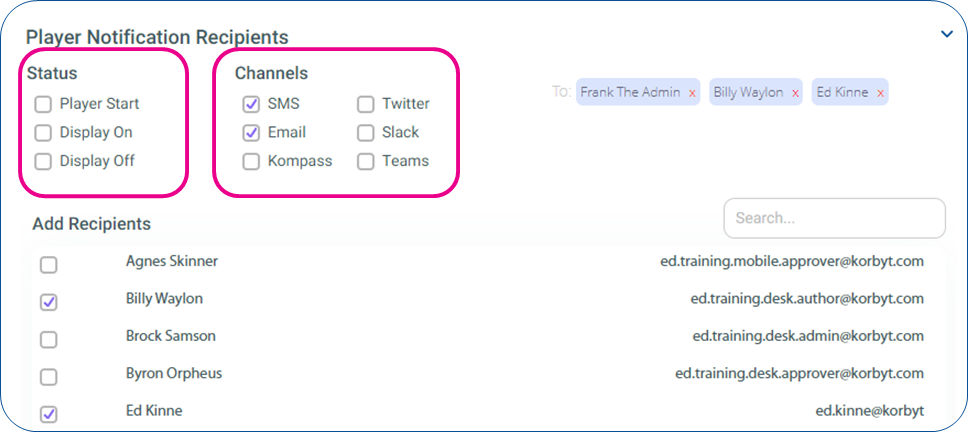
Email is the default communication channel, and sends an email from “noreply@korbyt.com” through the Korbyt email services, and is the only channel supported without customized settings
Other channels will require configuration in the Tenant Settings > Delivery
Notifications will always be sent to the user’s preferred communication channel, regardless of the check boxes selected here
Player Status
A player going from Active to Inactive, or Inactive to Active, will always trigger an alert
No checkbox selection is required for these alerts
Other Status messages are options and will require compatible hardware
Player Start: player restarts / app starts
Applies to only KWP/KDA/BrightSign
Display On: Display power-on detected via HDMI CEC Command
Applies to only KWP/KDA/BrightSign
ONLY sent out when using a CEC command to turn the Display On
Display Off: Display power-off detected via HDMI CEC Command
Applies to only KWP/KDA/BrightSign
ONLY sent out when using a CEC command to turn the Display Off
If you would like the email to be sent to a group email address, simply add a user to Korbty with that email address. You can then select that email as the recipient of the emails
Content Assigned
This area shows content that has been assigned to the player group through Playlists
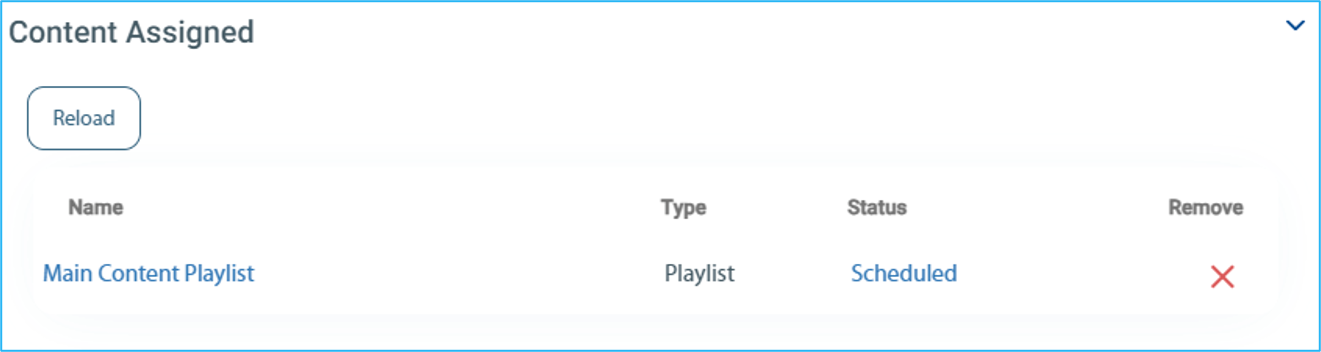
Content assigned to the group can be removed from the group with the Red X
Install Scriptlets
Scriptlets are small sections of code that can be installed into a player to make it act in a custom way that is not a normally supported option

Scriptlets, by their nature, are custom and have to be matched to the specific player and end goal
Still need help? Share an idea