Adding Players to your Korbyt Tenant - Provisioning
Provisioning Players one at a time, in bulk, and removing them from your tenant
Written By Ed Kinne
Provisioning players is a simple process to attach your player to your Korbyt environment. Claiming them as your device.
Once the device has power and is connected to a stable internet connection, it will try to establish a connection with the Korbyt Provisioning Server. The media player also has to be allowed to reach Korbyt.com Port 443 so that it can freely communicate with the Korbyt.com Cloud. This may be different for fully on-premises installations.
In the CMS, you provide information about your player(s) so that your Tenant knows which players to connect to from the provisioning server. This can be done one at a time with a provisioning token or in bulk using a spreadsheet.
Provisioning a Single Player
After the player is turned on for the first time, a provisioning screen will be shown that displays your player’s provisioning token. similar to this example.
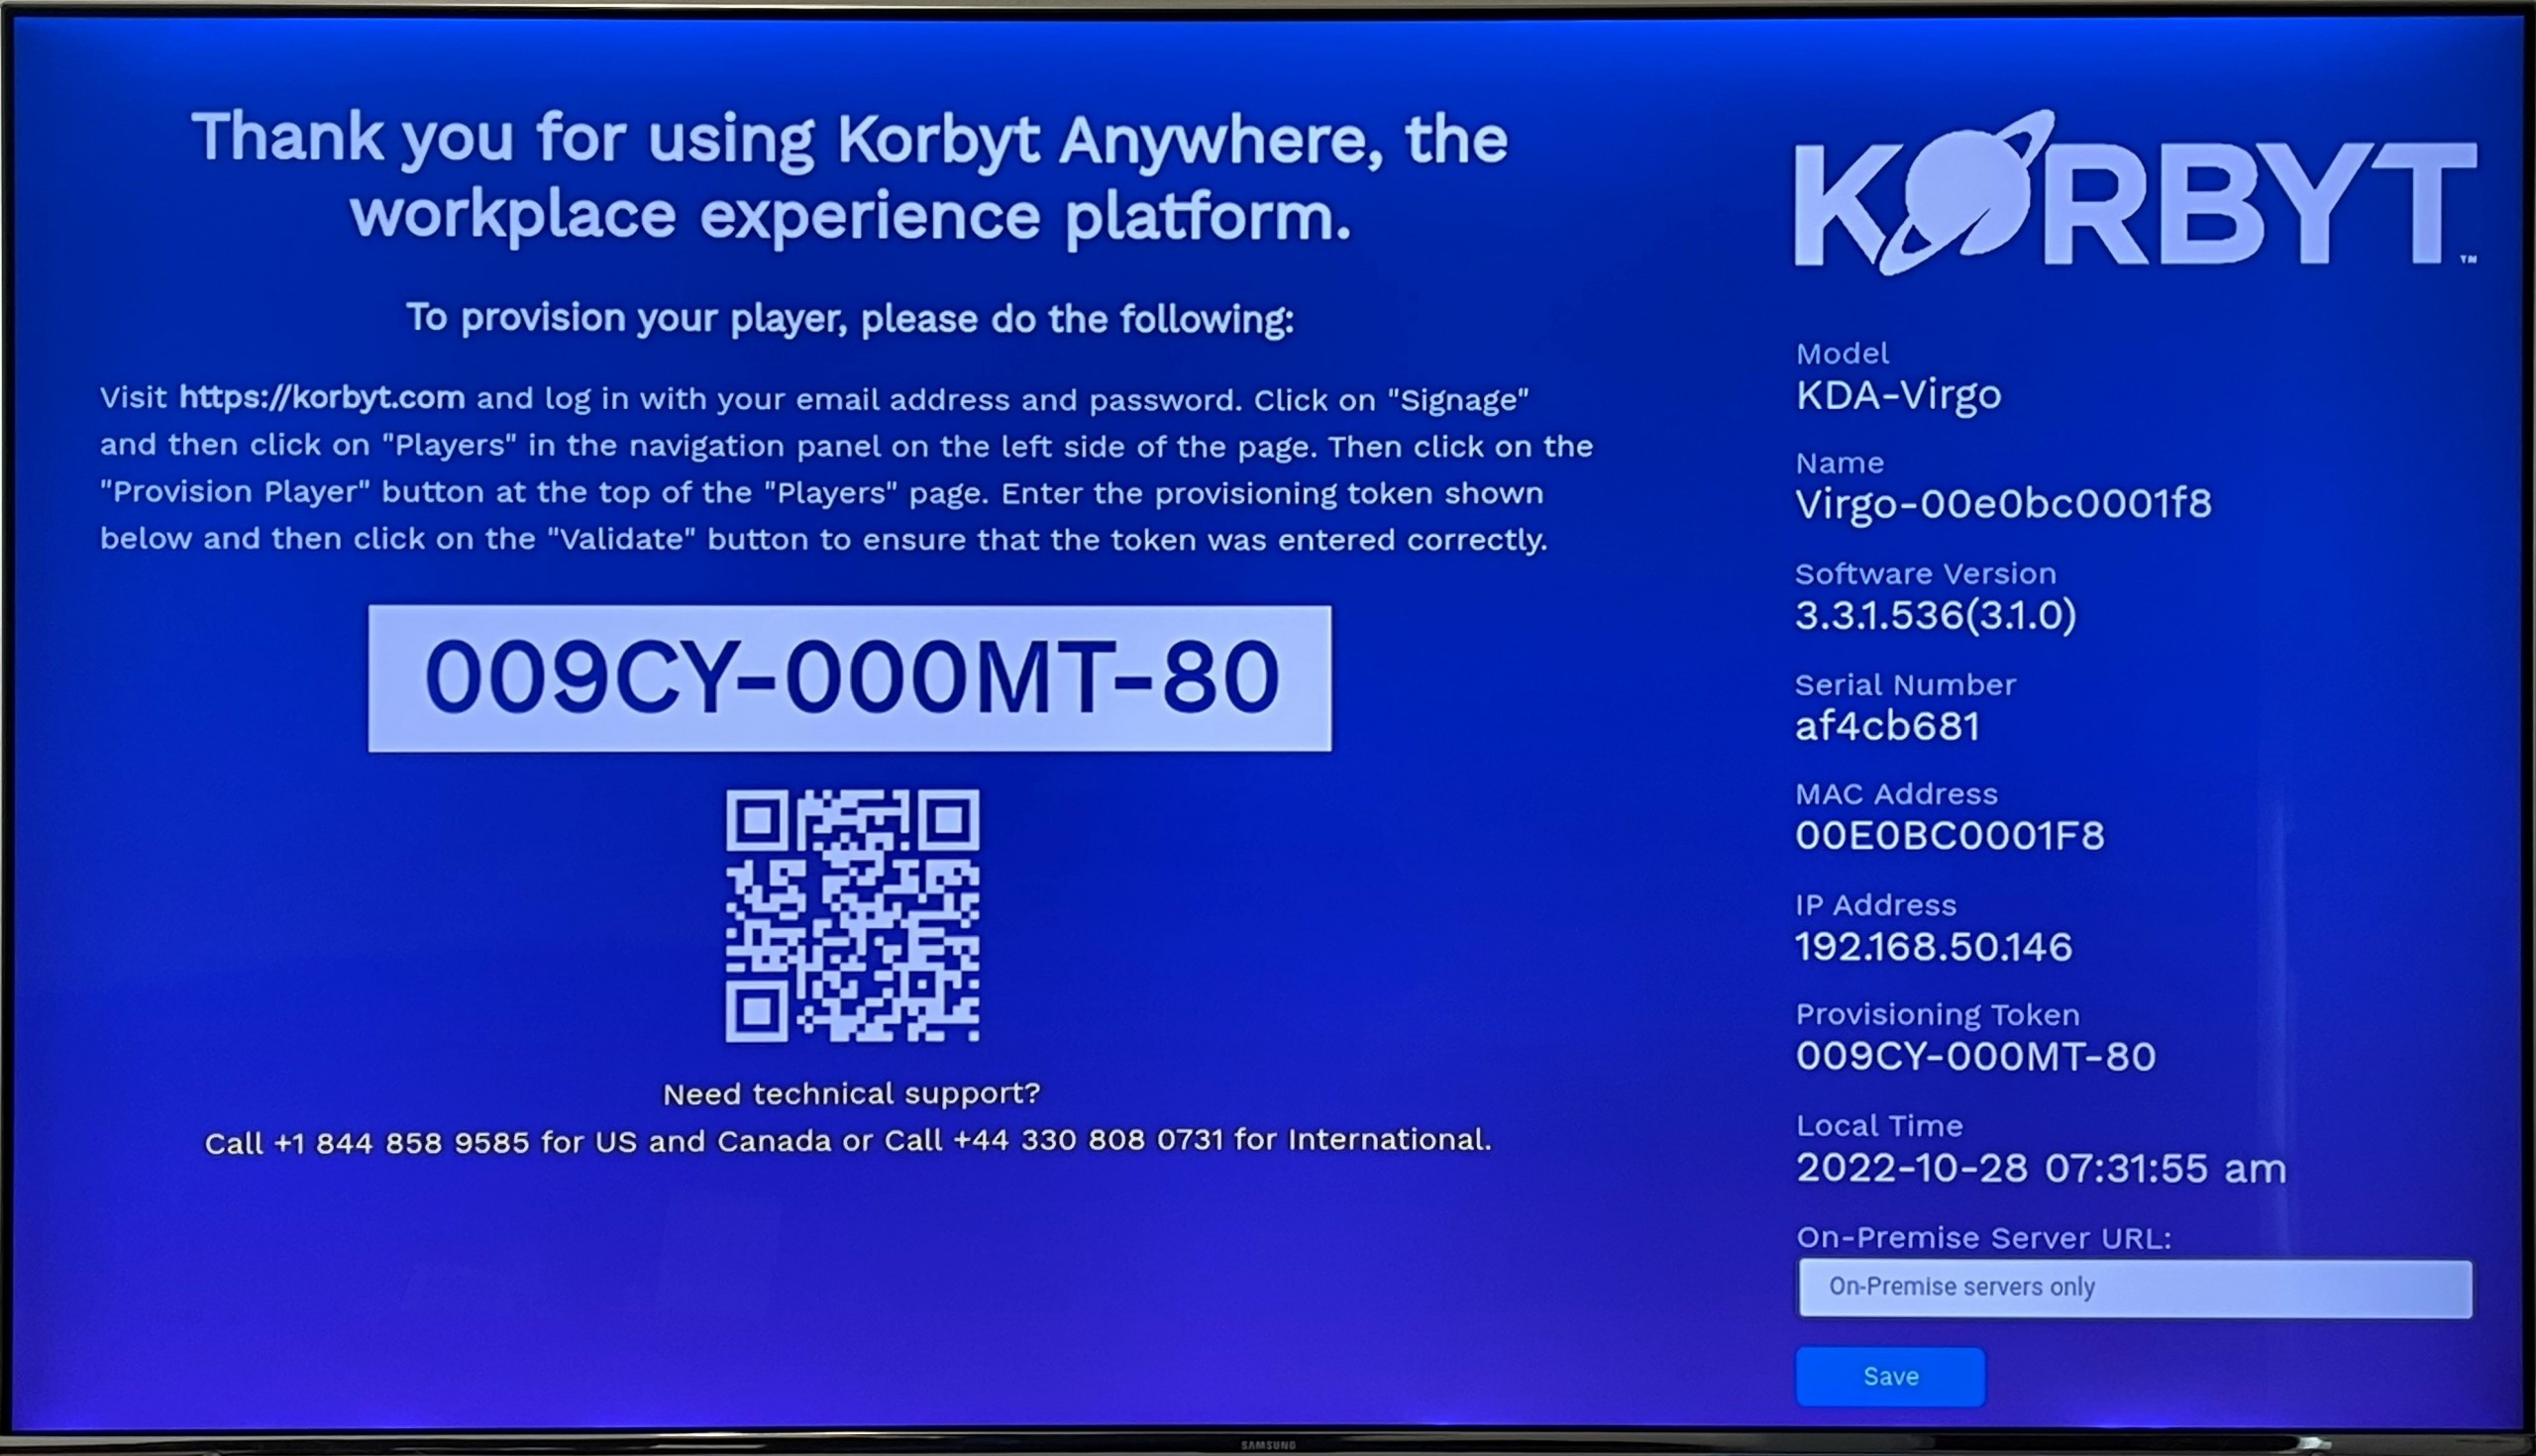
In your Korbyt CMS
Open the Mega Menu, then in the Device Management column, click Players.
Click the Provision Player button in the upper right

In the Provision Player dialog, enter the provisioning token and click Provision.
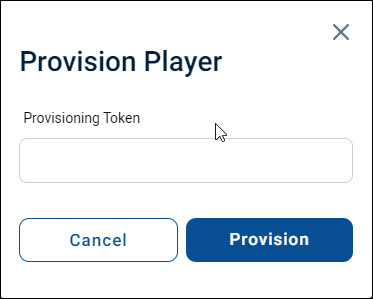
A confirmation message appears; click OK.
The new player will appear on the Players screen.
The player will have a “Pending” status until the player is done provisioning and has their first successful connection to Korbyt
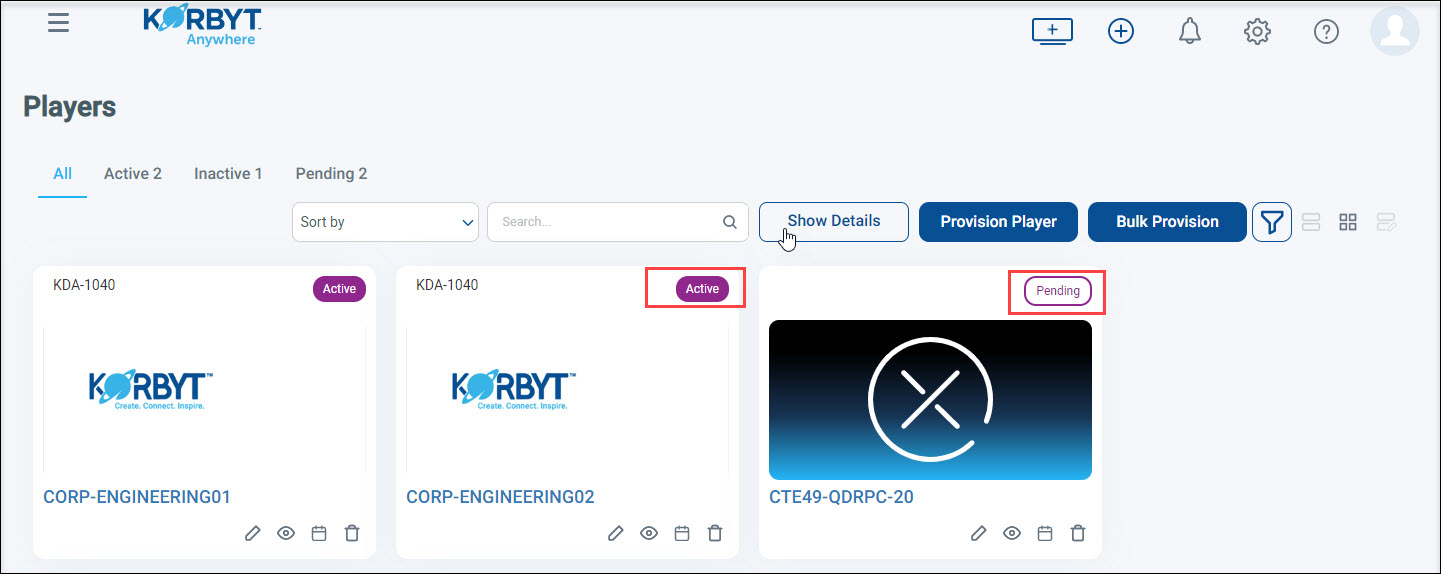
Once provisioning is completed and the player is able to reach Korbyt, the status will change to “Active” and the player will begin playing Default Content Setting Default Content Playlist
If a player remains in Pending status for more than 5 minutes (time might take longer if a slow network connection), or the player does not begin showing default content and remains on the Provisioning Token Screen, you will want to
Check the Korbyt Player Network Connections as well as the player’s physical connection as well
Does the player reach your network, and does the network allow the player to reach Korbyt
Check for any typos when entering the player provisioning token
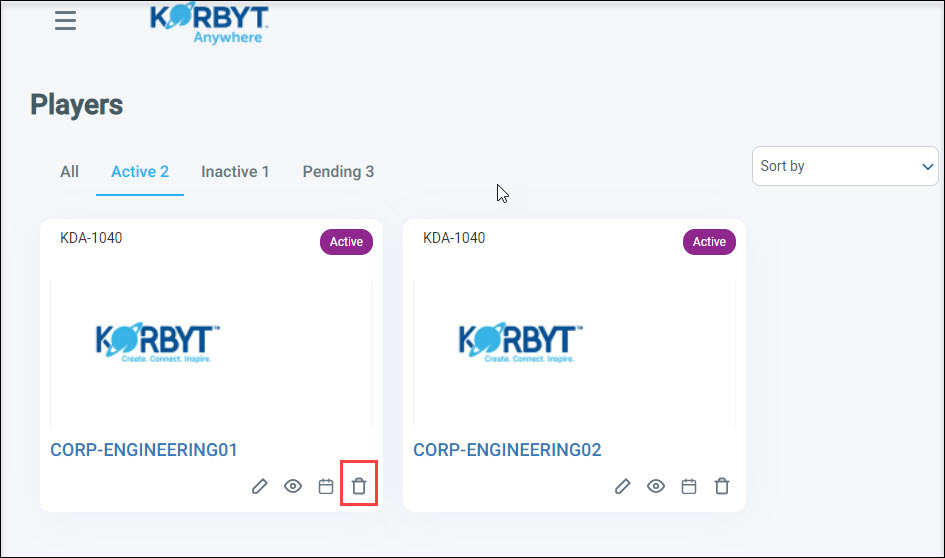
If an incorrect token was entered, you can use the trashcan to remove the incorrect entry and start again.
Provisioning Players in Bulk
Bulk Provision allows you to upload a CSV file that contains information for multiple players and provision them simultaneously.
To Bulk Provision Players
Open the Mega Menu, then in the Device Management column, click Players.
Click the Bulk Provision button in the upper right

If you already have players and need to update their information as well you may want to click Provision Export instead to get a file with your existing player information instead of the blank template
This will open the bulk player interface
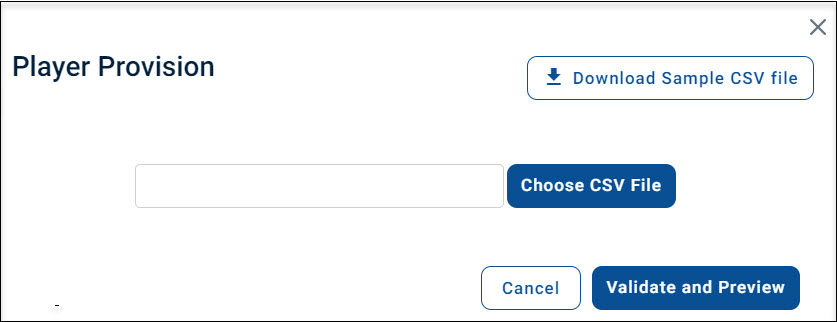
Click Download the Sample CSV file
Open the file on your computer and fill in your player information for the devices you are adding

While it is recommended to fill in all fields, only the MAC Address, Number of Outputs, and Name are required.
MAC Address Column, and other acceptable unique identifiers
While the device MAC address is a common unique identifier for most devices, including KDAs and KWPs, some specific hardware types use different identifiers to uniquely identify a piece of hardware.
If you are using BrightSign devices, you must use the BrightSign Serial Number instead of the MAC Address
You enter “sn:” and then the device’s serial number
example - sn:1234567899
If you are using PWA for the player, you will use the Provisioning Token instead of a MAC address
You enter “pt:” and then the provisioning token
example - pt:CDR7-N12345-00
If you are using Zoom Rooms as Players, you will need to retrieve the Zoom Room ID and use that instead of the Mac address
More details can be found in the Configuring Zoom Rooms article
You enter”zid:” and then the Zoom room ID
example - zid:qULKNcsdnvw0938
If you are using the Amazon Signage Stick, you will need to retrieve the DSN for each device from the Amazon Admin portal at console.signage.amazon.com for a list of the devices connected to your Amazon account.
You enter”dsn:” and then the DSN value found in the admin portal
example - dsn:GT53SA0152020AL6
Accepted County Values for Bulk Provision
Currently, the “Country” column will accept specific values
Expand for the list of accepted Country values
Expand for the list of accepted Country values
Entering something other than these values will leave the field as “select country”
Argentina
Australia
Austria
Bahrain
Bangladesh
Belgium
Brazil
Bulgaria
Burma
Canada
China
Columbia
Costa Rica
Denmark
Egypt
Finland
France
Germany
Hong Kong
Hungary
India
Indonesia
Iran
Iraq
Ireland
Israel
Italy
Japan
Kenya
Korea, South
Kuwait
Latvia
Lebanon
Lithuania
Malaysia
Mayotte
Mexico
Mongolia
Morocco
Netherlands
New Zealand
Norway
Pakistan
Paraguay
Peru
Philippines
Poland
Portugal
Puerto Rico
Qatar
Romania
Russia
Saudi Arabia
Singapore
South Africa
Spain
Sri Lanka
Sweden
Switzerland
Taiwan
Tanzania
Thailand
Tunisia
Turkey
Ukraine
United Arab Emirates
United Kingdom
United States
Venezuela
Vietnam
Yemen
Zambia
Zimbabwe
Custom Code Column for BrightSign, Samsung, and LG
Some player brands (BrightSign, Samsung, LG) can use a Custom Column at the far right to set values unique to those devices, if needed
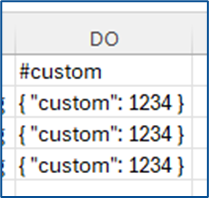
Expand for More Details on using the Custom Column in Bulk CSV File
Expand for More Details on using the Custom Column in Bulk CSV File
The Custom Column is needed for the settings for Custom Properties information. BrighSign, LG, and Samsung are the only players that use Custom Properties in the Korbyt tenant that set Orientation, Time Zone, Daily Reboot, or Enable Native Playback)
The sections below detail the use for those different devices
BrightSign Custom Column CSV Codes
Below is an example of how the “#Custom” column has to be filled on the csv file for a BrightSign player to be used in the Korbyt CMS.
Below are the Field that can be used for the BrightSign
********************************************************************
{
“orientation”: “0”,
“timezone”: “”,
“dailyreboot”: “”
}
********************************************************************
/**
Possible Values
* orientation:
0
90
270
* timezone:
“”=”don’t set”
“EST”=”US Eastern Time”
“CST”=”US Central Time”
“MST”=”US Mountain Time”
“PST”=”US Pacific Time”
“AKST”=”Alaska Time”
“HST”=”Hawaii-Aleutian Time with no Daylight Savings (Hawaii)”
“HST1″=”Hawaii-Aleutian Time with Daylight Saving”
“MST1″=”US MT without Daylight Saving Time (Arizona)”
“EST1″=”US ET without Daylight Saving Time (East Indiana)”
“AST”=”Atlantic Time”
“CST2″=”Mexico (Mexico City)”
“MST2″=”Mexico (Chihuahua)”
“PST2″=”Mexico (Tijuana)”
“BRT”=”Brazil Time (Sao Paulo)”
“NST”=”Newfoundland Time”
“AZOT”=”Azores Time”
“GMTBST”=”London/Dublin Time”
“WET”=”Western European Time”
“CET”=”Central European Time”
“EET”=”Eastern European Time”
“MSK”=”Moscow Time”
“AMT”=”Delta Time Zone (Samara)”
“YEKT”=”Echo Time Zone (Yekaterinburg)”
“IST”=”Indian Standard Time”
“NPT”=”Nepal Time”
“OMST”=”Foxtrot Time Zone (Omsk)”
“JST”=”Japanese Standard Time”
“CXT”=”Christmas Island Time (Australia)”
“AWST”=”Australian Western Time”
“AWST1″=”Australian Western Time without Daylight Saving Time”
“ACST”=”Australian Central Standard Time (CST) with Daylight Saving Time”
“ACST1″=”Darwin, Australia/Darwin, and Australian Central Standard Time (CST) without Daylight Saving Time”
“AEST”=”Australian Eastern Time with Daylight Saving Time”
“AEST1″=”Australian Eastern Time without Daylight Saving Time (Brisbane)”
“NFT”=”Norfolk (Island) Time (Australia)”
“NZST”=”New Zealand Time (Auckland)”
“CHAST”=”Fiji Time, Fiji, Pacific/Fiji, Yankee Time Zone (Fiji)”
“SST”=”X-ray Time Zone (Pago Pago)”
“GMT”=”Greenwich Mean Time”
“GMT-1″=”1 hour behind Greenwich Mean Time”
“GMT-2″=”2 hours behind Greenwich Mean Time”
“GMT-3″=”3 hours behind Greenwich Mean Time”
“GMT-3:30″=”3.5 hours behind Greenwich Mean Time”
“GMT-4″=”4 hours behind Greenwich Mean Time”
“GMT-4:30″=”4.5 hours behind Greenwich Mean Time”
“GMT-5″=”5 hours behind Greenwich Mean Time”
“MT-6″=”6 hours behind Greenwich Mean Time”
“GMT-7″=”7 hours behind Greenwich Mean Time”
“GMT-8″=”8 hours behind Greenwich Mean Time”
“GMT-9″=”9 hours behind Greenwich Mean Time”
“GMT-9:30″=”9.5 hours behind Greenwich Mean Time”
“GMT-10″=”10 hours behind Greenwich Mean Time”
“GMT-11″=”11 hours behind Greenwich Mean Time”
“GMT-12″=”12 hours behind Greenwich Mean Time”
“GMT-13″=”13 hours behind Greenwich Mean Time”
“GMT-14″=”14 hours behind Greenwich Mean Time”
“GMT+1″=”1 hour ahead of Greenwich Mean Time”
“GMT+2″=”2 hours ahead of Greenwich Mean Time”
“GMT+3″=”3 hours ahead of Greenwich Mean Time”
“GMT+3:30″=”3.5 hours ahead of Greenwich Mean Time”
“GMT+4″=”4 hours ahead of Greenwich Mean Time”
“GMT+4:30″=”4.5 hours ahead of Greenwich Mean Time”
“GMT+5″=”5 hours ahead of Greenwich Mean Time”
“GMT+5:30″=”5.5 hours ahead of Greenwich Mean Time”
“GMT+6″=”6 hours ahead of Greenwich Mean Time”
“GMT+6:30″=”6.5 hours ahead of Greenwich Mean Time”
“GMT+7″=”7 hours ahead of Greenwich Mean Time”
“GMT+7:30″=”7.5 hours ahead of Greenwich Mean Time”
“GMT+8″=”8 hours ahead of Greenwich Mean Time”
“GMT+8:30″=”8.5 hours ahead of Greenwich Mean Time”
“GMT+9″=”9 hours ahead of Greenwich Mean Time”
“GMT+9:30″=”9.5 hours ahead of Greenwich Mean Time”
“GMT+10″=”10 hours ahead of Greenwich Mean Time”
“GMT+10:30″=”10.5 hours ahead of Greenwich Mean Time”
“GMT+11″=”11 hours ahead of Greenwich Mean Time”
“GMT+11:30″=”11.5 hours ahead of Greenwich Mean Time”
“GMT+12″=”12 hours ahead of Greenwich Mean Time”
“GMT+12:30″=”12.5 hours ahead of Greenwich Mean Time”
“GMT+13″=”13 hours ahead of Greenwich Mean Time”
“GMT+14″=”14 hours ahead of Greenwich Mean Time”
dailyreboot:
“”=”Never”
“0”=”Midnight”
“1”=”01:00am”
“2”=”02:00am”
“3”=”03:00am”
“4”=”04:00am”
“5”=”05:00am”
“6”=”06:00am”
“7”=”07:00am”
“8”=”08:00am”
“9”=”09:00am”
“10”=”10:00am”
“11”=”11:00am”
“12”=”Noon”
“13”=”01:00pm”
“14”=”02:00pm”
“15”=”03:00pm”
“16”=”04:00pm”
“17”=”05:00pm”
“18”=”06:00pm”
“19”=”07:00pm”
“20”=”08:00pm”
“21”=”09:00pm”
“22”=”10:00pm”
“23”=”11:00pm”
/
LG Custom Column CSV Codes
In the example below, we show how the “#Custom” column has to be filled on the csv file for a LG player to be used in the Korbyt CMS. FOr the LG player only Orientation can be set.
***********************************************************************
{
“orientation”: “0”
}
***********************************************************************
/**
Possible Values
* orientation:
0
90
*/
Samsung Custom Column CSV Codes
In the example below, we show how the “#Custom” column has to be filled on the csv file for a Samsung player to be used in the Korbyt CMS. For the Samsung player only Orientation and Visual Console can be set.
************************************************************************
{
“orientation”: “0”,
“visualConsole”: “”
}
/**
Possible Values
* orientation:
0
90
visualConsole:
0=Disabled
1=Enabled
/
Save the CSV file on your computer
In the Bulk Player Provision Window in Korbyt, click Choose CSV File in the Player Provision Pop-up to upload your updated CSV File
Click Validate and Preview to display a preview and alert you of each player’s information.
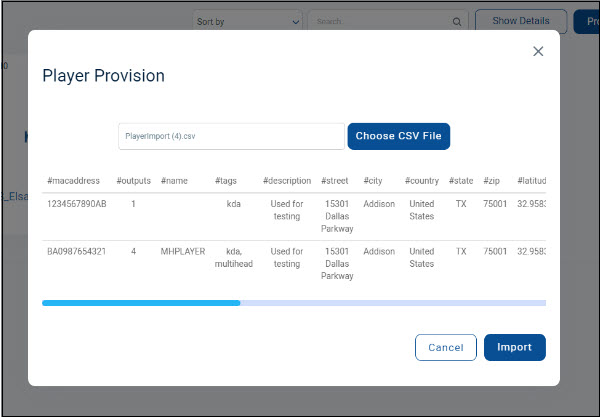
After verifying that the information is correct, click Import.
If all players are accepted, then you will see a “Player has been successfully provisioned” notification. If any are filled out improperly, you will see a failed notification and the reason why the players failed to provision. If any of the players fail to provision, then you must make the necessary corrections in the CSV file, save the file, and re-upload it.
The new players will appear on the Players screen.
The player will have a “Pending” status until the player is done provisioning and has its first successful connection to Korbyt
If you have bulk provisioned players to Korbyt before deploying them on your network, the player will remain listed as Pending in the CMS until it has its first connection
Once provisioning is completed and the player is able to reach Korbyt, the status will change to “Active” and the player will begin playing Default Content Setting Default Content Playlist
If a player remains in Pending status for more than 5 minutes after it is powered on and connected to your network(time might take longer if a slow network connection), or the player does not begin showing default content and remains on the Provisioning Token Screen, you will want to
Check the Korbyt Player Network Connections as well as the player’s physical connection as well
Does the player reach your network, and does the network allow the player to reach Korbyt?
Check for any typos on the provisioning sheet
If an incorrect token was entered, you can use the trashcan to remove the incorrect entry and start again.
Using Bulk Provisioning to Change Player Details
This can be used to add new players to the tenant or edit the information about players that already exist on the tenant.
If you already have players provisioned to your tenant, the Provision Export allows you to download a CSV file already populated with your unique devices’ information, rather than the blank template
You can also use this process to add new player devices while updating already provisioned ones.
To Use the Bulk Provision to Change Player Details
Open the Mega Menu, then in the Device Management column, click Players.
Click the Provision Export button

This will download a CSV file to your computer that has your player details
Change the player details you want to update in the CSV file
For fields you do not want to change, leave them as they were
Accepted County Values for Bulk Provision
Expand for the list of accepted Country values
Entering something other than these values will leave the field as “select country”
Argentina
Australia
Austria
Bahrain
Bangladesh
Belgium
Brazil
Bulgaria
Burma
Canada
China
Columbia
Costa Rica
Denmark
Egypt
Finland
France
Germany
Hong Kong
Hungary
India
Indonesia
Iran
Iraq
Ireland
Israel
Italy
Japan
Kenya
Korea, South
Kuwait
Latvia
Lebanon
Lithuania
Malaysia
Mayotte
Mexico
Mongolia
Morocco
Netherlands
New Zealand
Norway
Pakistan
Paraguay
Peru
Philippines
Poland
Portugal
Puerto Rico
Qatar
Romania
Russia
Saudi Arabia
Singapore
South Africa
Spain
Sri Lanka
Sweden
Switzerland
Taiwan
Tanzania
Thailand
Tunisia
Turkey
Ukraine
United Arab Emirates
United Kingdom
United States
Venezuela
Vietnam
Yemen
Zambia
Zimbabwe
Custom Code Column for BrightSign, Samsung, and LG
Some player brands (BrightSign, Samsung, LG) can use a Custom Column at the far right to set values unique to those devices, if needed
Expand for More Details on Using the Custom Column in a Bulk CSV File
Expand for More Details on Using the Custom Column in a Bulk CSV File
The Custom Column is needed for the settings for Custom Properties information. BrighSign, LG, and Samsung are the only players that use Custom Properties in the Korbyt tenant that set Orientation, Time Zone, Daily Reboot, or Enable Native Playback)
The sections below detail the use for those different devices
BrightSign Custom Column CSV Codes
Below is an example of how the “#Custom” column has to be filled on the csv file for a BrightSign player to be used in the Korbyt CMS.
Below are the Field that can be used for the BrightSign
********************************************************************
{
“orientation”: “0”,
“timezone”: “”,
“dailyreboot”: “”
}
********************************************************************
/**
Possible Values
* orientation:
0
90
270
* timezone:
“”=”don’t set”
“EST”=”US Eastern Time”
“CST”=”US Central Time”
“MST”=”US Mountain Time”
“PST”=”US Pacific Time”
“AKST”=”Alaska Time”
“HST”=”Hawaii-Aleutian Time with no Daylight Savings (Hawaii)”
“HST1″=”Hawaii-Aleutian Time with Daylight Saving”
“MST1″=”US MT without Daylight Saving Time (Arizona)”
“EST1″=”US ET without Daylight Saving Time (East Indiana)”
“AST”=”Atlantic Time”
“CST2″=”Mexico (Mexico City)”
“MST2″=”Mexico (Chihuahua)”
“PST2″=”Mexico (Tijuana)”
“BRT”=”Brazil Time (Sao Paulo)”
“NST”=”Newfoundland Time”
“AZOT”=”Azores Time”
“GMTBST”=”London/Dublin Time”
“WET”=”Western European Time”
“CET”=”Central European Time”
“EET”=”Eastern European Time”
“MSK”=”Moscow Time”
“AMT”=”Delta Time Zone (Samara)”
“YEKT”=”Echo Time Zone (Yekaterinburg)”
“IST”=”Indian Standard Time”
“NPT”=”Nepal Time”
“OMST”=”Foxtrot Time Zone (Omsk)”
“JST”=”Japanese Standard Time”
“CXT”=”Christmas Island Time (Australia)”
“AWST”=”Australian Western Time”
“AWST1″=”Australian Western Time without Daylight Saving Time”
“ACST”=”Australian Central Standard Time (CST) with Daylight Saving Time”
“ACST1″=”Darwin, Australia/Darwin, and Australian Central Standard Time (CST) without Daylight Saving Time”
“AEST”=”Australian Eastern Time with Daylight Saving Time”
“AEST1″=”Australian Eastern Time without Daylight Saving Time (Brisbane)”
“NFT”=”Norfolk (Island) Time (Australia)”
“NZST”=”New Zealand Time (Auckland)”
“CHAST”=”Fiji Time, Fiji, Pacific/Fiji, Yankee Time Zone (Fiji)”
“SST”=”X-ray Time Zone (Pago Pago)”
“GMT”=”Greenwich Mean Time”
“GMT-1″=”1 hour behind Greenwich Mean Time”
“GMT-2″=”2 hours behind Greenwich Mean Time”
“GMT-3″=”3 hours behind Greenwich Mean Time”
“GMT-3:30″=”3.5 hours behind Greenwich Mean Time”
“GMT-4″=”4 hours behind Greenwich Mean Time”
“GMT-4:30″=”4.5 hours behind Greenwich Mean Time”
“GMT-5″=”5 hours behind Greenwich Mean Time”
“MT-6″=”6 hours behind Greenwich Mean Time”
“GMT-7″=”7 hours behind Greenwich Mean Time”
“GMT-8″=”8 hours behind Greenwich Mean Time”
“GMT-9″=”9 hours behind Greenwich Mean Time”
“GMT-9:30″=”9.5 hours behind Greenwich Mean Time”
“GMT-10″=”10 hours behind Greenwich Mean Time”
“GMT-11″=”11 hours behind Greenwich Mean Time”
“GMT-12″=”12 hours behind Greenwich Mean Time”
“GMT-13″=”13 hours behind Greenwich Mean Time”
“GMT-14″=”14 hours behind Greenwich Mean Time”
“GMT+1″=”1 hour ahead of Greenwich Mean Time”
“GMT+2″=”2 hours ahead of Greenwich Mean Time”
“GMT+3″=”3 hours ahead of Greenwich Mean Time”
“GMT+3:30″=”3.5 hours ahead of Greenwich Mean Time”
“GMT+4″=”4 hours ahead of Greenwich Mean Time”
“GMT+4:30″=”4.5 hours ahead of Greenwich Mean Time”
“GMT+5″=”5 hours ahead of Greenwich Mean Time”
“GMT+5:30″=”5.5 hours ahead of Greenwich Mean Time”
“GMT+6″=”6 hours ahead of Greenwich Mean Time”
“GMT+6:30″=”6.5 hours ahead of Greenwich Mean Time”
“GMT+7″=”7 hours ahead of Greenwich Mean Time”
“GMT+7:30″=”7.5 hours ahead of Greenwich Mean Time”
“GMT+8″=”8 hours ahead of Greenwich Mean Time”
“GMT+8:30″=”8.5 hours ahead of Greenwich Mean Time”
“GMT+9″=”9 hours ahead of Greenwich Mean Time”
“GMT+9:30″=”9.5 hours ahead of Greenwich Mean Time”
“GMT+10″=”10 hours ahead of Greenwich Mean Time”
“GMT+10:30″=”10.5 hours ahead of Greenwich Mean Time”
“GMT+11″=”11 hours ahead of Greenwich Mean Time”
“GMT+11:30″=”11.5 hours ahead of Greenwich Mean Time”
“GMT+12″=”12 hours ahead of Greenwich Mean Time”
“GMT+12:30″=”12.5 hours ahead of Greenwich Mean Time”
“GMT+13″=”13 hours ahead of Greenwich Mean Time”
“GMT+14″=”14 hours ahead of Greenwich Mean Time”
dailyreboot:
“”=”Never”
“0”=”Midnight”
“1”=”01:00am”
“2”=”02:00am”
“3”=”03:00am”
“4”=”04:00am”
“5”=”05:00am”
“6”=”06:00am”
“7”=”07:00am”
“8”=”08:00am”
“9”=”09:00am”
“10”=”10:00am”
“11”=”11:00am”
“12”=”Noon”
“13”=”01:00pm”
“14”=”02:00pm”
“15”=”03:00pm”
“16”=”04:00pm”
“17”=”05:00pm”
“18”=”06:00pm”
“19”=”07:00pm”
“20”=”08:00pm”
“21”=”09:00pm”
“22”=”10:00pm”
“23”=”11:00pm”
/
LG Custom Column CSV Codes
In the example below, we show how the “#Custom” column has to be filled on the csv file for a LG player to be used in the Korbyt CMS. FOr the LG player only Orientation can be set.
***********************************************************************
{
“orientation”: “0”
}
***********************************************************************
/**
Possible Values
* orientation:
0
90
*/
Samsung Custom Column CSV Codes
In the example below, we show how the “#Custom” column has to be filled on the csv file for a Samsung player to be used in the Korbyt CMS. For the Samsung player only Orientation and Visual Console can be set.
************************************************************************
{
“orientation”: “0”,
“visualConsole”: “”
}
/**
Possible Values
* orientation:
0
90
visualConsole:
0=Disabled
1=Enabled
/
Save the CSV file on your computer
In the CMS, click the Bulk Provision button in the upper right
This will open the bulk player interface
In the Bulk Player Provision Window in Korbyt, click Choose CSV File in the Player Provision Pop-up to upload your updated CSV File
Click Validate and Preview to display a preview and alert you of each player’s information.
After verifying that the information is correct, click Import.
If all players are accepted, then you will see a “Player has been successfully provisioned” notification. If any are filled out improperly, you will see a failed notification and the reason why the players failed to provision. If any of the players fail to provision, then you must make the necessary corrections in the CSV file, save the file, and re-upload it.
Your Player’s information will now be updated
Players that are Inactive may not fully update their information until they are Active again
Deprovisioning / Removing Players from Your Tenant
Deprovisioning a Player removes it from your Korbyt Anywhere service. It is best to have the player powered on and connected to the internet through the deprovisioning process.
To deprovision a player:
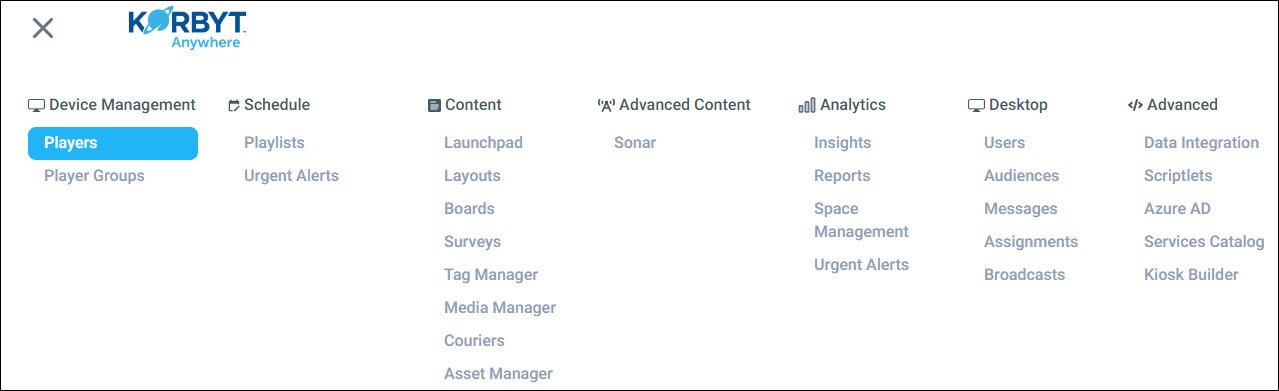
Click the Mega Menu icon, and in the Device Management column, click on Players.
Click the Trash icon for the corresponding player.
On the Confirmation Screen, click Yes
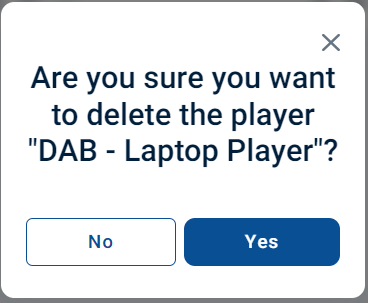
If the player is connected to the internet, it will receive the command from the system, reboot, and deprovision itself.
If the player is not connected to the internet, it will continue to play cached content until it is reconnected to an internet connection. Once re-connected, it will de-provision fully.
Still need help? Share an idea